Slow Preview in After Effects? Here are 5 TESTED tips to fix it.
After Effects, although a powerhouse of a program, does have its downfalls especially when it comes to previewing what you’ve produced in your various compositions and layers. Even with a unit of a PC/Mac, things can run slow; it takes no prisoners whether you’ve got 8GB or 64GB of RAM. Here at Grizzle, we’ve found a few workarounds and fixes to get your render previews back up to speed and fix a slow preview in After Effects.
Simplify your project
One of the biggest causes of stutter and lag when using After Effects is having a lot of compositions and layers. This combined with the use of effects and 3D camera work can seriously slow down your compositions and render times. Here’s a bullet-pointed list of how to make your project a bit lighter and less sluggish:
1. Ensure your pre-comps are only as big as they need to be
Pre-comp sizing is an important factor that is often overlooked when creating projects in After Effects. We’ve put it to the test to prove that using pre-comps that are sized correctly are beneficial performance-wise when put up against full-res pre-comps.
To explain, say you have a Main Composition that is 1920 x 1080 px. In your main comp, you have a pre-comp of the same 1920 x 1080 px resolution. In that pre-comp is a small animation, or still graphic that only takes up a 500 x 500 px area, the rest has nothing in it (alpha). Using your pre-comp this way is much more performance-intensive than using a 500 x 500 px composition size to house your animation or graphic. Let’s delve into this a bit more…
To verify this, we did two tests. In the first, we had a 1920 x 1080 px Main Composition (60fps, 10s duration). We also had two Pre-Comps, one was 1920 x 1080 px, and the was 500 x 500 px. Each contained the same animated elements of equal resolution. We would then time how long it would take to preview each Main Composition (the 1920px and the 500px one). All previews were done at 100% zoom and Full resolution.
Here are our findings:
1920 x 1080 px Pre-Comp
- Test 1: 2.18s
- Test 2: 2.23s
- Test 3: 2.09s
- Avg: 2.16s
500 x 500 px Pre-Comp
- Test 1: 1.94s
- Test 2: 2.04s
- Test 3: 1.83s
- Avg: 1.93s
As you can see, the 500px Pre-Comp performed better during the preview. Whilst this difference isn’t huge, it does scale with larger projects. We took our same Pre-Comps and multiplied them by 6 in our Main Composition to see what would happen under a heavier load. Here are our results from that:
1920 x 1080 px Pre-Comp x6
- Test 1: 8.17s – Purge Size: 172MB
- Test 2: 9.62s – Purge Size: 222MB
- Test 3: 8.64s – Purge Size: 198MB
- Test 4: 8.37s – Purge Size: 174MB
- Test 5: 8.58s – Purge Size: 238MB
- Avg: 8.68s
500 x 500 px Pre-Comp x6
- Test 1: 4.49s – Purge Size: 22.6MB
- Test 2: 4.43s – Purge Size: 23.3MB
- Test 3: 4.43s – Purge Size: 20.3MB
- Test 4: 4.15s – Purge Size: 20.6MB
- Test 5: 4.57s – Purge Size: 12.6MB
- Avg: 4.41s
That’s over 50% more efficient. If your compositions are even bigger, and your projects have a lot more components, this is definitely something to consider when trying to get your preview speed down.
Hot Tip: When creating a Pre-Comp from layers in the current composition, the new Pre-Comp will take the resolution value from the composition the layers were in. Make sure you update the new Pre-Comp’s comp settings to reduce the resolution of it.
2. To Pre-Comp or not to Pre-Comp…
Pre-comps are a great feature in After Effects. They allow you to simplify your workflow and condense otherwise unwieldy projects. But what effect do they have on performance? Does your preview run faster when using pre-comps or when just using layers? We put this to the test too.

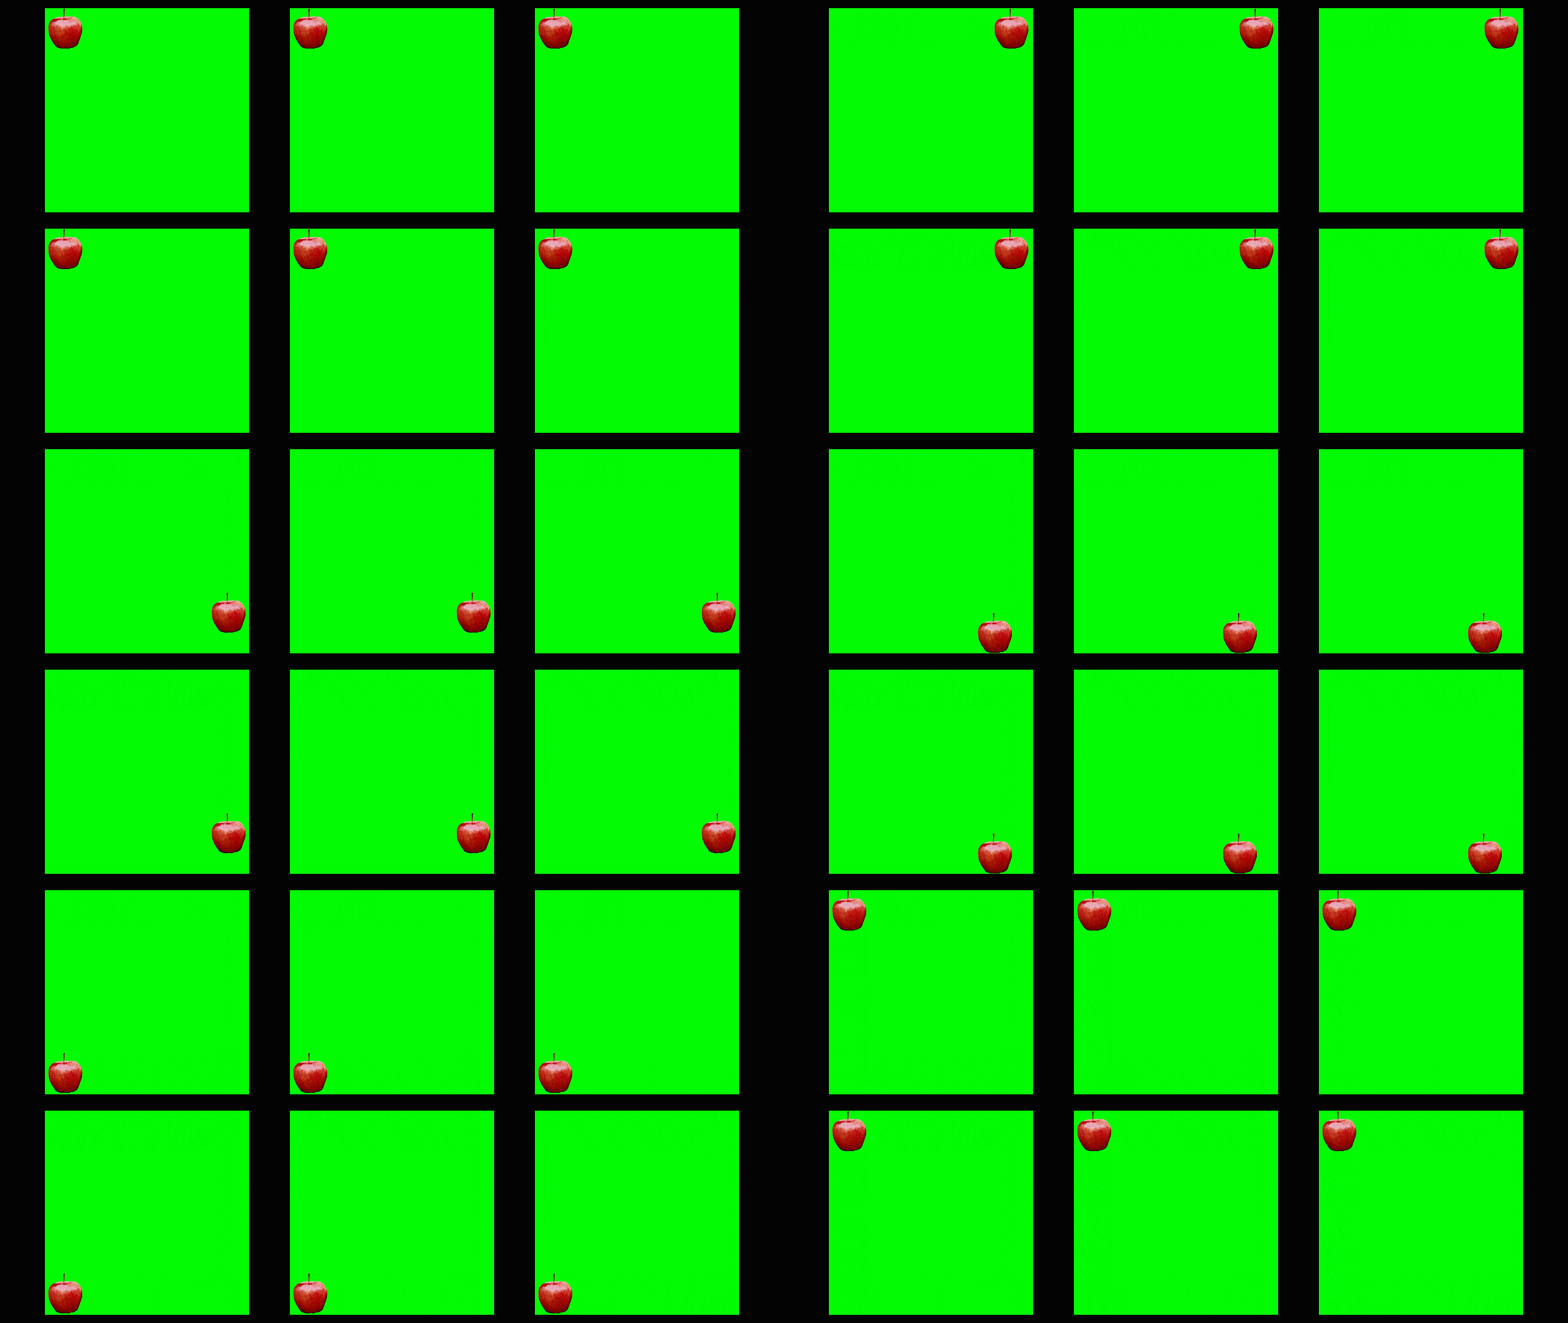
Similarly to point 1, we had two 1920 x 1080 px Main Compositions, one for the Pre-Comped animation and one for the non-Pre-Comped animation. This time, we replaced the black circle with an image of an apple to text image rendering. So to make this more understandable, say you had your main 1920 x 1080 px composition, and you filled it with a whole bunch of layers all creating various animations. You think to yourself, should I pre-compose some of these layers to make my preview run faster? Take a look below to answer that very question.
Here’s what we found:
Using a Pre-Comp
- Test 1: 2.31s
- Test 2: 2.48s
- Test 3: 2.19s
- Avg: 2.33s
Not using a Pre-Comp
- Test 1: 1.82s
- Test 2: 1.76s
- Test 3: 1.86s
- Avg: 1.81s
So at this stage, not using a Pre-Comp to render an animation is more beneficial than using one, but again, not by a big margin. We went ahead and did the same as we did in point 1 and tried putting six of the animations in the Main Composition. So now the Main Composition with the Pre-Comps in it has 7 layers (the background plus the 6 animation pre-comps) and the Main Composition with just the animation layers in it has 19 layers (the background plus 3 layers for each separate apple animation).
Again, to make this more understandable, let’s say you have your main composition with a whole bunch of layers in it, all creating six versions of the same animation in different places in the comp. Would it be wise to pre-compose the animation and duplicate the pre-comp instead of having 6 different versions of it? Let’s take a look, here’s how that test turned out:
Pre-Comped Animation x6
- Test 1: 2.82s – Purge Size: 12.6MB
- Test 2: 2.59s – Purge Size: 85.9MB
- Test 3: 2.64s – Purge Size: 12.1MB
- Test 4: 2.74s – Purge Size: 82.6MB
- Test 5: 2.69s – Purge Size: 92.4MB
- Avg: 2.70s
Non-Pre-Comped Animation x6
- Test 1: 5.87s – Purge Size: 254MB
- Test 2: 6.92s – Purge Size: 724MB
- Test 3: 6.67s – Purge Size: 824MB
- Test 4: 6.77s – Purge Size: 762MB
- Test 5: 6.47s – Purge Size: 420MB
- Avg: 6.54s

So as you can see, it’s a lot better if you Pre-Comp multiple animations. Just having layers in one comp is very slow in comparison – over 40% slower. As a takeaway, if you have a single animation, it’s okay to keep that in your main comp, however, if you’re using more than one, you should pre-comp the animation to improve your preview performance.
3. But what if I’ve got pre-comps in pre-comps? Would it be faster to stack pre-comps or not? Are you following 🤯?
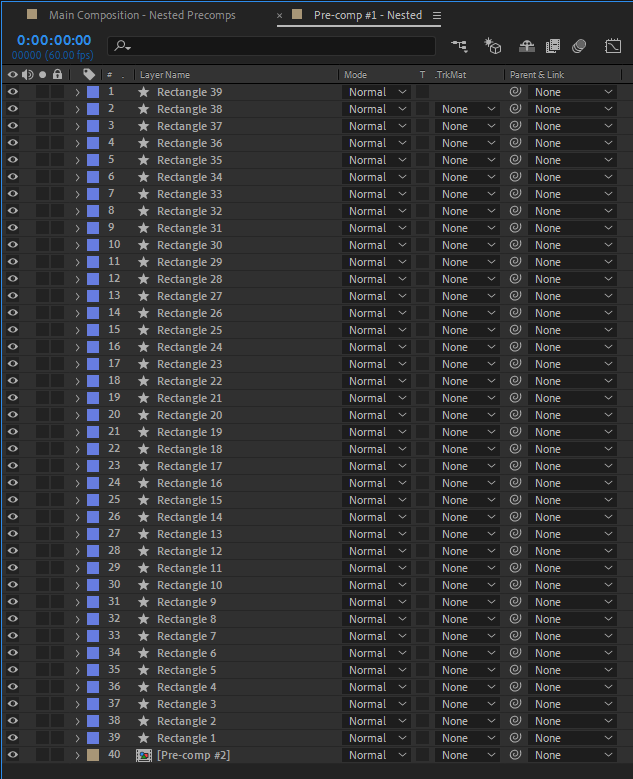
What on Earth do we mean?! Okay, let’s make this simple (or as simple as we can). Let’s say that you’ve got your Main Composition with 1 pre-comp in it. Within that pre-comp is more pre-comps each housing a different portion of your animation. For ease, let’s call this nested pre-comps. So the composition order would be: Main Composition > Pre-comp (Whole Animation) > Pre-comp #1 (1st animated element), Pre-comp #2 (2nd animated element).

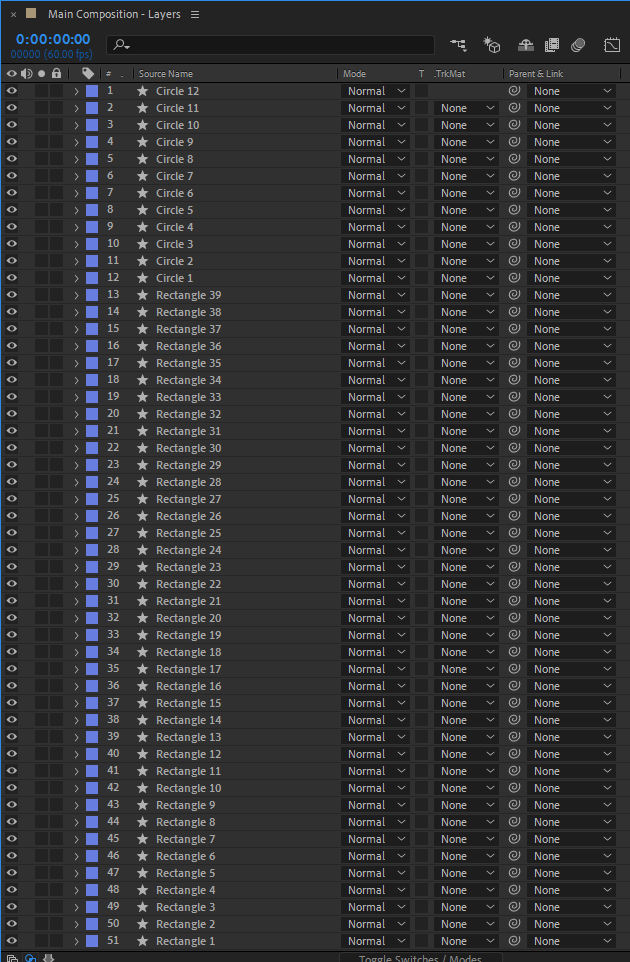
We did a few tests for this. The first is as described above, with the nested pre-comps. For the second, we just had two pre-comps in the main composition, each with a different animation. And for the final test, we just put all the animated layers in the main composition (very messy!). Here are our results:


Nested Comps
- Test 1: 2.79s
- Test 2: 3.65s
- Test 3: 2.67s
- Test 4: 3.10s
- Test 5: 2.87s
- Avg: 3.02s

Separate Comps
- Test 1: 3.70s
- Test 2: 3.74s
- Test 3: 3.85s
- Test 4: 4.38s
- Test 5: 3.78s
- Avg: 3.89s

All Layers in Main Comp
- Test 1: 5.63s
- Test 2: 5.87s
- Test 3: 5.20s
- Test 4: 5.22s
- Test 5: 5.06s
- Avg: 5.40s
So, we can see from all this that using nested pre-comps is the way to go when it comes to complex animations that use a lot of layers. Oh, and we suggest staying away from the messy comps like the one above unless you really need to.
4. Completed a section of your project (or at least to a point that you’re happy with for now)?
Pre-rendering sections of your project can be a great way to reduce the number of resources After Effects needs when previewing what you’ve done. Simply go up to Composition > Pre-render, put in your required settings and hit Render.
The Pre-render option means that After Effects will automatically add an Import & Replace post-render action to your render. This will replace your original, heavy composition with the newly rendered video. This should dramatically speed up your originally slow preview in After Effects.
5. Use a proxy to reduce the resolution of certain elements in your composition
If you’re working with artwork, video footage or images that are of a high resolution, using a proxy will dramatically reduce the time it takes to preview your work. A proxy is basically a lower resolution version of a still image or a still frame of a video that can be used in place of the full resolution original.
While you may not be able to see exactly what the final outcome of your composition will look like when using proxies, you will be able to swiftly animate elements and preview your composition much easier than you would when using the original footage.
To set up a proxy for video footage, open the video in Photoshop. You can then save one of the frames of the video as an image. If you wish, you could also reduce the resolution of this frame by heading to Image, Canvas Size… and inputting a new resolution. If you’re setting up a proxy for just an image, this can be applied in the same way to reduce the resolution of it.
6. Bonus Tip #1: Been working on a project for a while and built up a substantial project window?
This happens to the best of us. When a project takes a turn of direction or assets get swapped about, the project window can get jam-packed with unused assets and compositions. Luckily, After Effects has a handy command that gets rid of any unused content.
To use this, make sure you don’t have any comps or layers selected in either the project window or timeline window. Head up to File > Remove Unused Footage. Depending on your project size, this might take a little while, but After Effects will go through your project window and remove anything that isn’t being used in any of your compositions, saving you time and sanity.
7. Bonus Tip #2: Preview your compositions in a lower resolution
This one may seem like passing the buck, but in some cases, your computer just won’t be able to handle what you’re throwing at it through After Effects. When this is the case, you should turn down the preview resolution of the comp you’re trying to view.
To do this, go to where it says Full at the bottom of the comp window – it’s a dropdown menu that also has options for Half, Third and Quarter. Try previewing your comp in a lower resolution than what it’s currently set to. If that doesn’t help much, you might have to reduce the overall size of your composition or use a proxy for high-res elements in your composition.
8. Bonus Tip #3: Split up mega After Effects projects into separate files
Again, this might not seem like a quick fix, but it’s a surefire way to speed up your slow preview in After Effects. This is also a great way for you to keep track of any storyboarding you may be doing for your project – just match the file names to the scenes in your storyboard.
A good way of doing this is to open a new After Effects file for each “scene” or separate part of your work and import your main After Effects file into each. From here, you can keep only the comps, assets and layers you need in each. Then, when you’re all finished with your project, you can create one final After Effects project and import each “scene” into it to make sure everything flows before rendering.
Lightning Fast After Effects
With these quick, and not-so-quick fixes in place, your After Effects project should preview at a faster speed than before. If you need more help on the matter, Adobe has a lot of information on their help pages about the issue.
Here @ Grizzle, we use a mix of predominantly After Effects and Cinema4D to achieve the looks and animation styles in our work. You can check out some of our projects here. If you’re looking to work with a fresh, no-fuss animation studio in Sheffield & London, drop us a line or give us a call, we’re more than happy to discuss any projects or ideas you may have.


