How to do Hand Drawn Animation in Photoshop
Grab your favourite brush preset and wield that graphics pen that’s been sat in your drawer since last year, it’s time to make some sweet hand drawn animation in Photoshop.
Contents
How to do Hand Drawn Animation in Photoshop
Setting things up
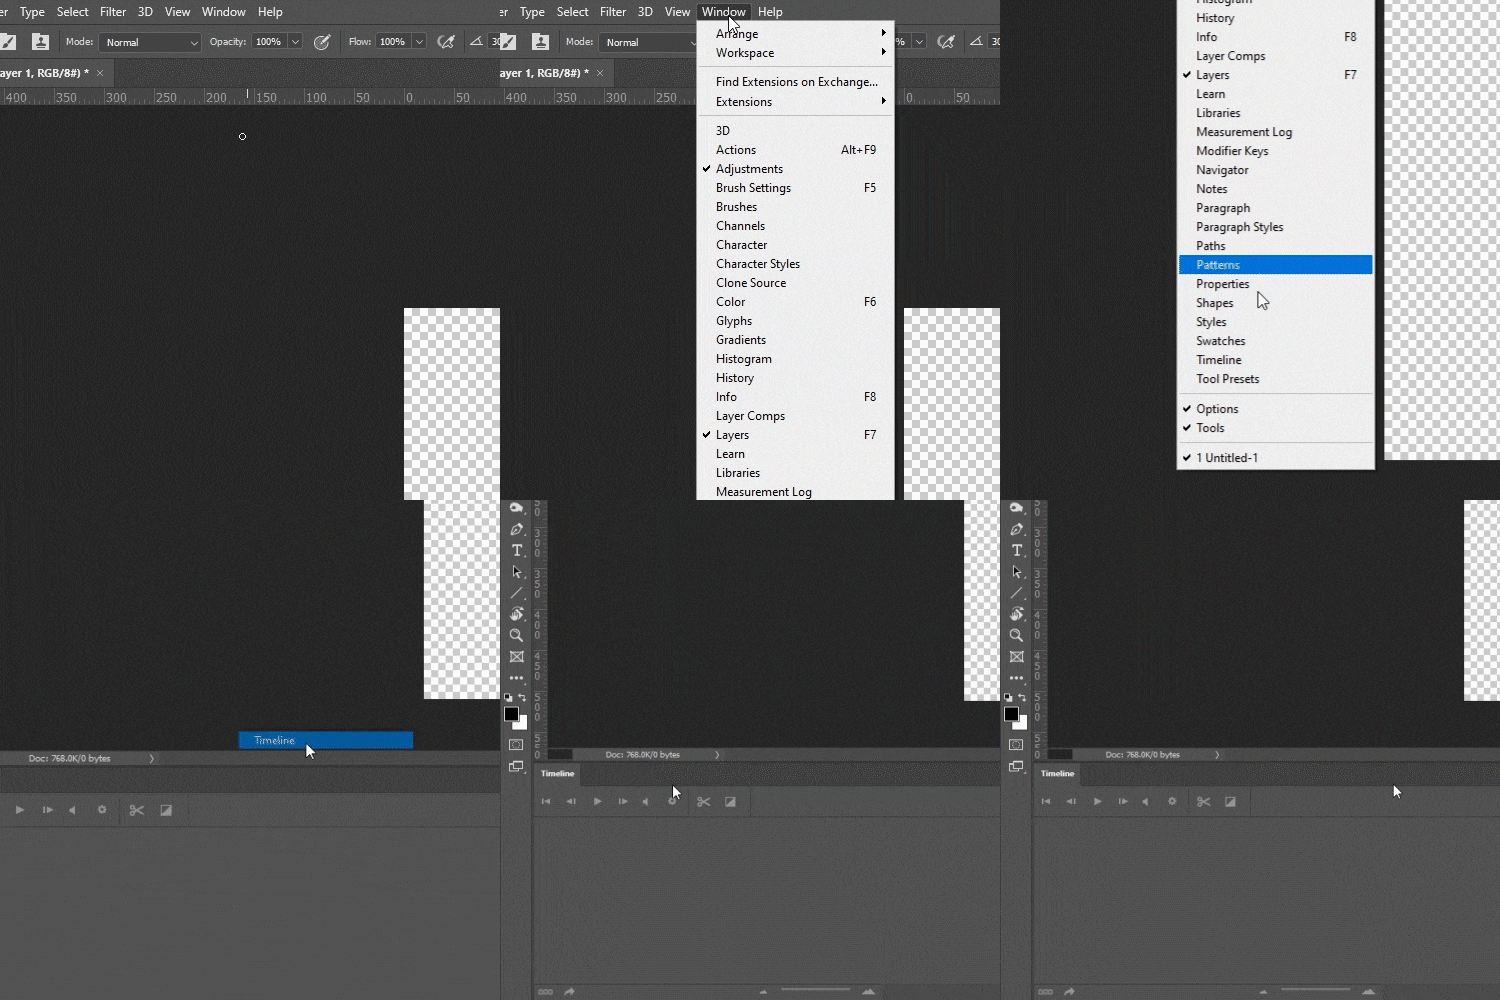
Let’s start out by grabbing the most important window for animating in Photoshop: the Timeline.
Head up to the top menu, click Window and check the Timeline option (near the bottom of the menu).
Canvas Setup & Background
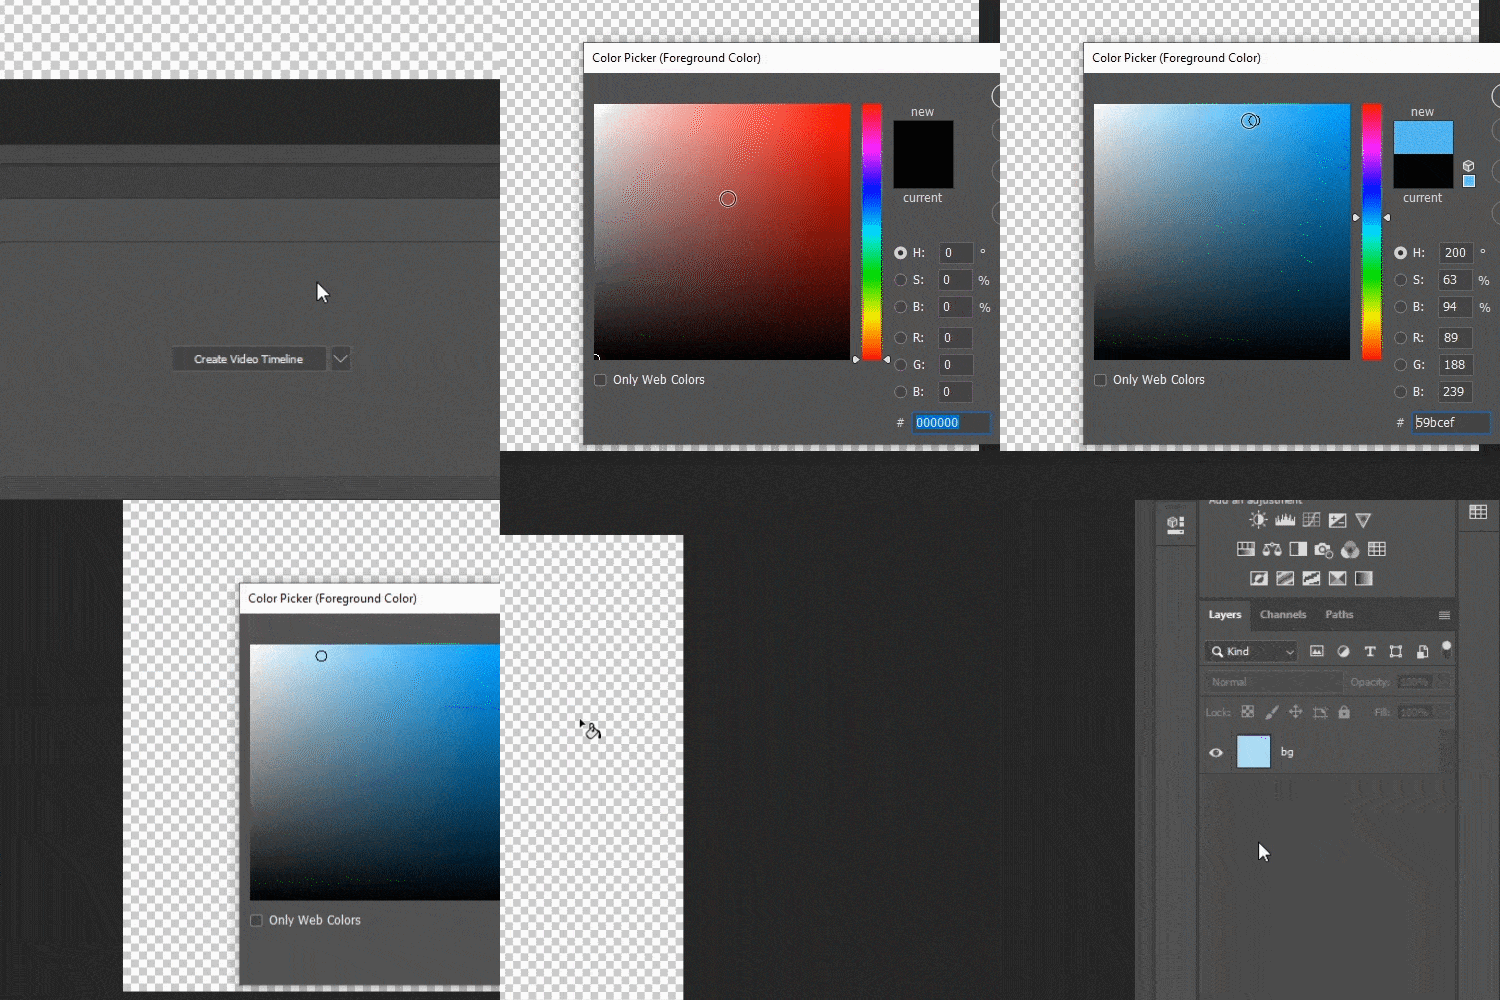
For this project, we’ll be using a 500px x 500px canvas, just to keep things simple.
Ctrl + N is the shortcut for a new document – set up your sizes in there and hit Create.
In the timeline window, click the Create Video Timeline button.
Pick a colour for the background of your project and fill the Layer 1 with that colour (you can rename it bg or something similar to keep track of your layers).
Creating a Video Layer in Photoshop
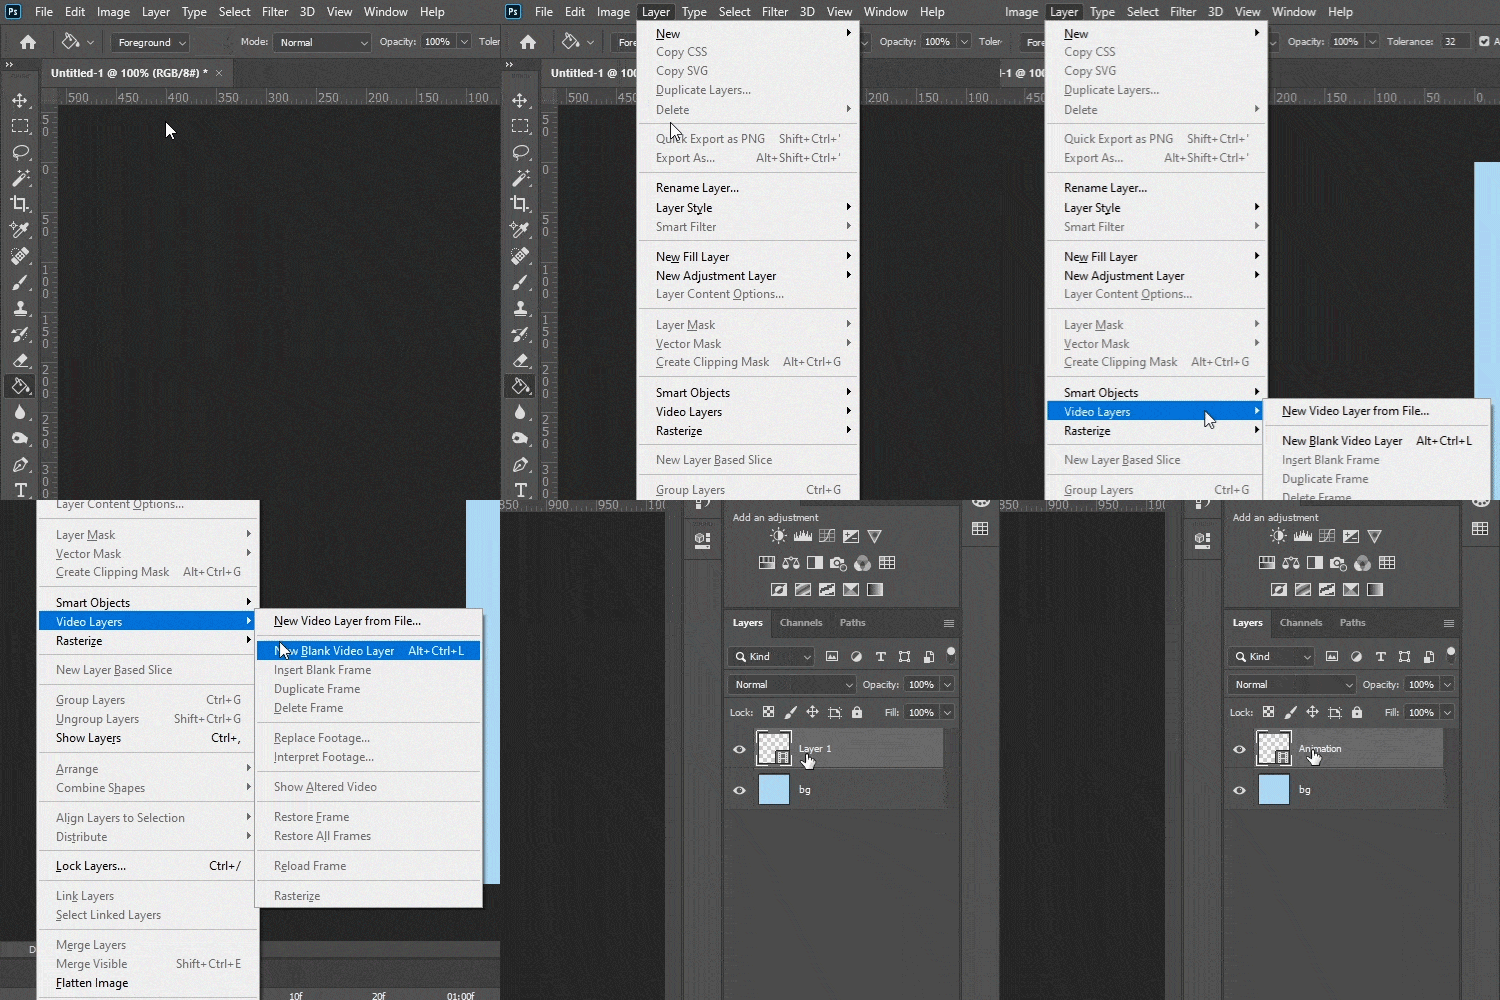
Up next, we’ve got to create an actual video layer.
To do this, go up to Layer, Video Layers, New Blank Video Layer (we set up a custom shortcut for this which you can do from the Edit, Keyboard Shortcuts… menu).
This is the layer that we’ll be using to do our animation as each frame of this layer in the timeline is different.
Let’s go ahead and call this layer Animation.
Setting the Timeline Frame Rate
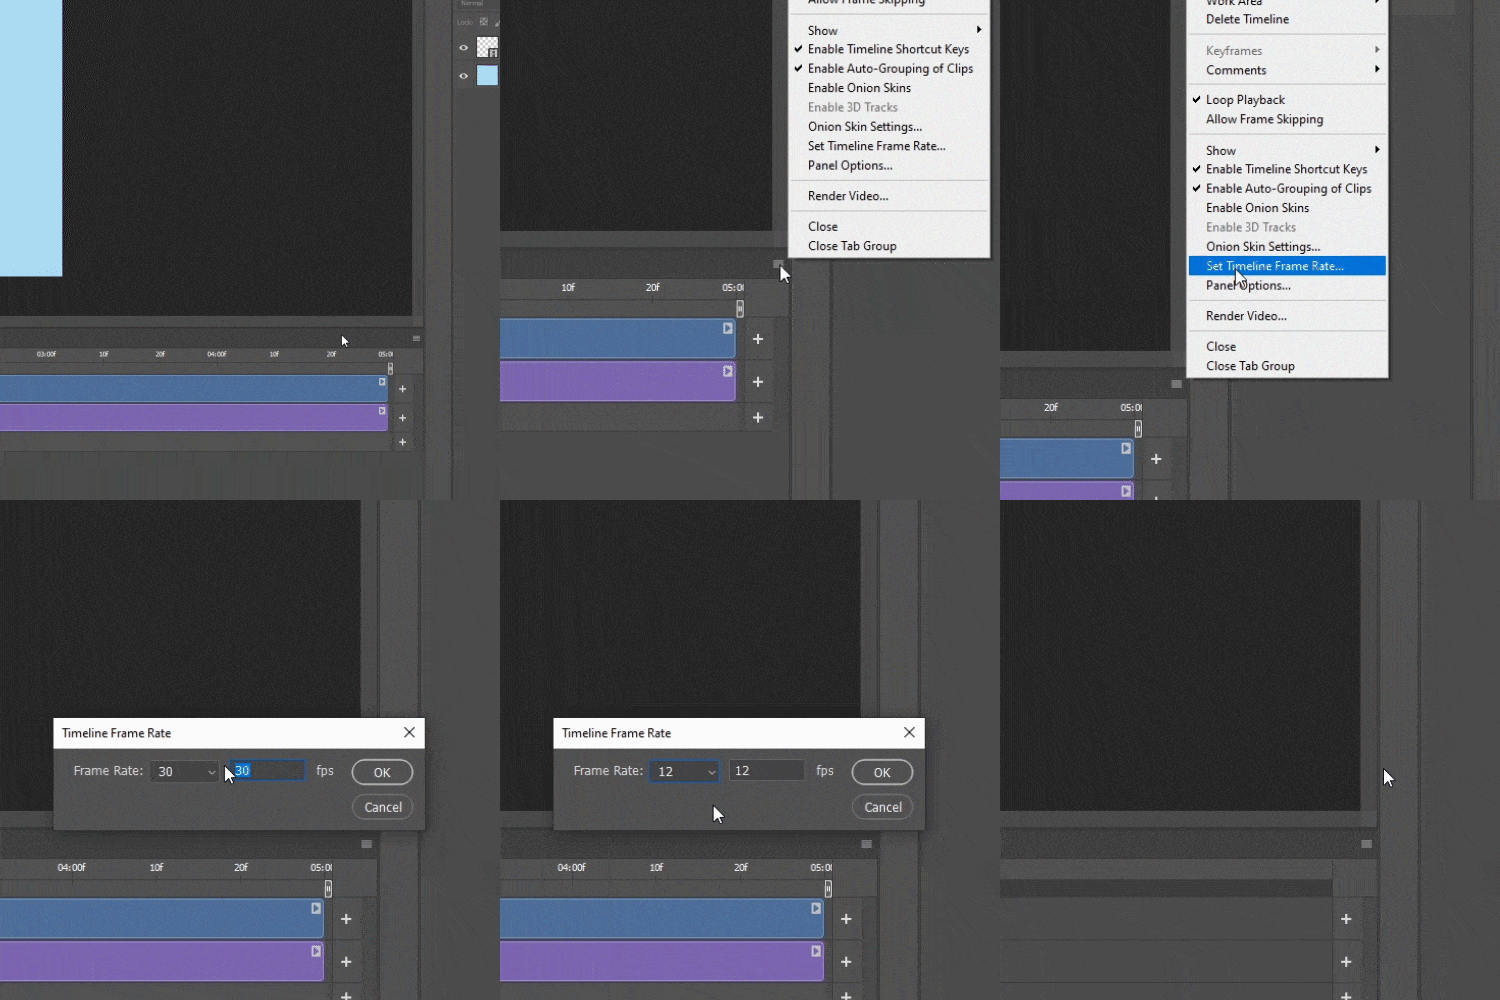
And finally, before we can create our masterpiece, let’s set the timeline frame rate.
This is, in most cases, personal preference, but we suggest going with 12 fps (frames per second).
This might not sound like a lot, but having a higher frame rate dramatically increases the time it takes to complete your animation with minimal gains on quality.
Plus, we do like the look 12 fps gives us.
To do this go to the menu in the Timeline window, click Set Timeline Frame Rate…, and either select 12 fps from the drop down menu or type 12 into the box.
The Animation Process
First things first, decide what sort of animation you want to do – including style and speed.
In this tutorial, we’re going to do a simple water splash animation.
The style we’re going to use will be similar to crayon/pastel on rough paper and the speed will be slow-medium.
With that out of the way, let’s actually get something on paper, so to speak.
Creating Still Animation Guides
To kick things off, let’s make some guides for ourselves.
These will help us keep track of where we need to animate whilst also giving us a good idea of how fast the animation should be.
Let’s set this up by firstly creating some points of reference in the frame – these won’t move throughout the animation so they can be placed on a standard Photoshop layer.
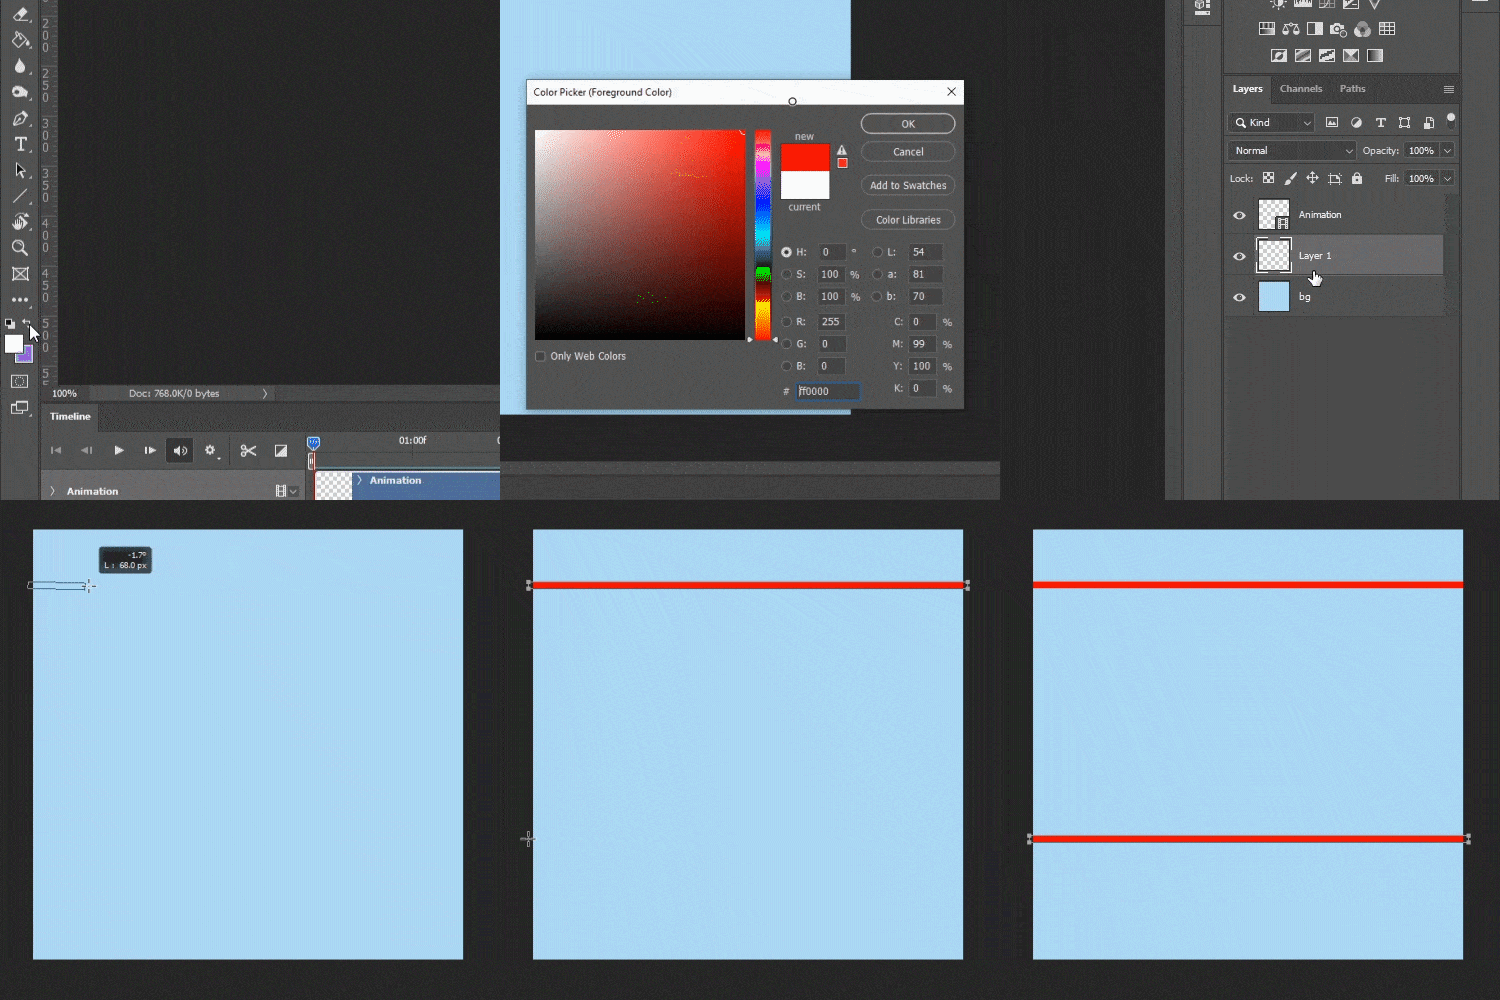
Pick a high contrast colour so you can clearly see where this guide is – for this, we’ve gone with red – and create a new layer either with the shortcut Ctrl + Shift + N or by clicking the new layer button at the bottom of the Layers panel.
Place this new layer below our Animation layer.
On this layer, we’re going to place two stationary red bars representing the areas in which our animation will start, and where it’ll finish (this is a suitable way of creating points of reference as we’re creating a water droplet animation that will start at the top of the screen and finish about 2/3s of the way down).
For this, we are going to use the line tool near the bottom of the left menu.
Hold Shift to have these lines snap to 90º angles.
Take a look at the GIF below to see where we placed ours.
Creating Speed & Content Area Guides
Up next, we need to create an animated guide layer – this layer is the one that will help us keep track of the speed of the animation and where we need to draw.
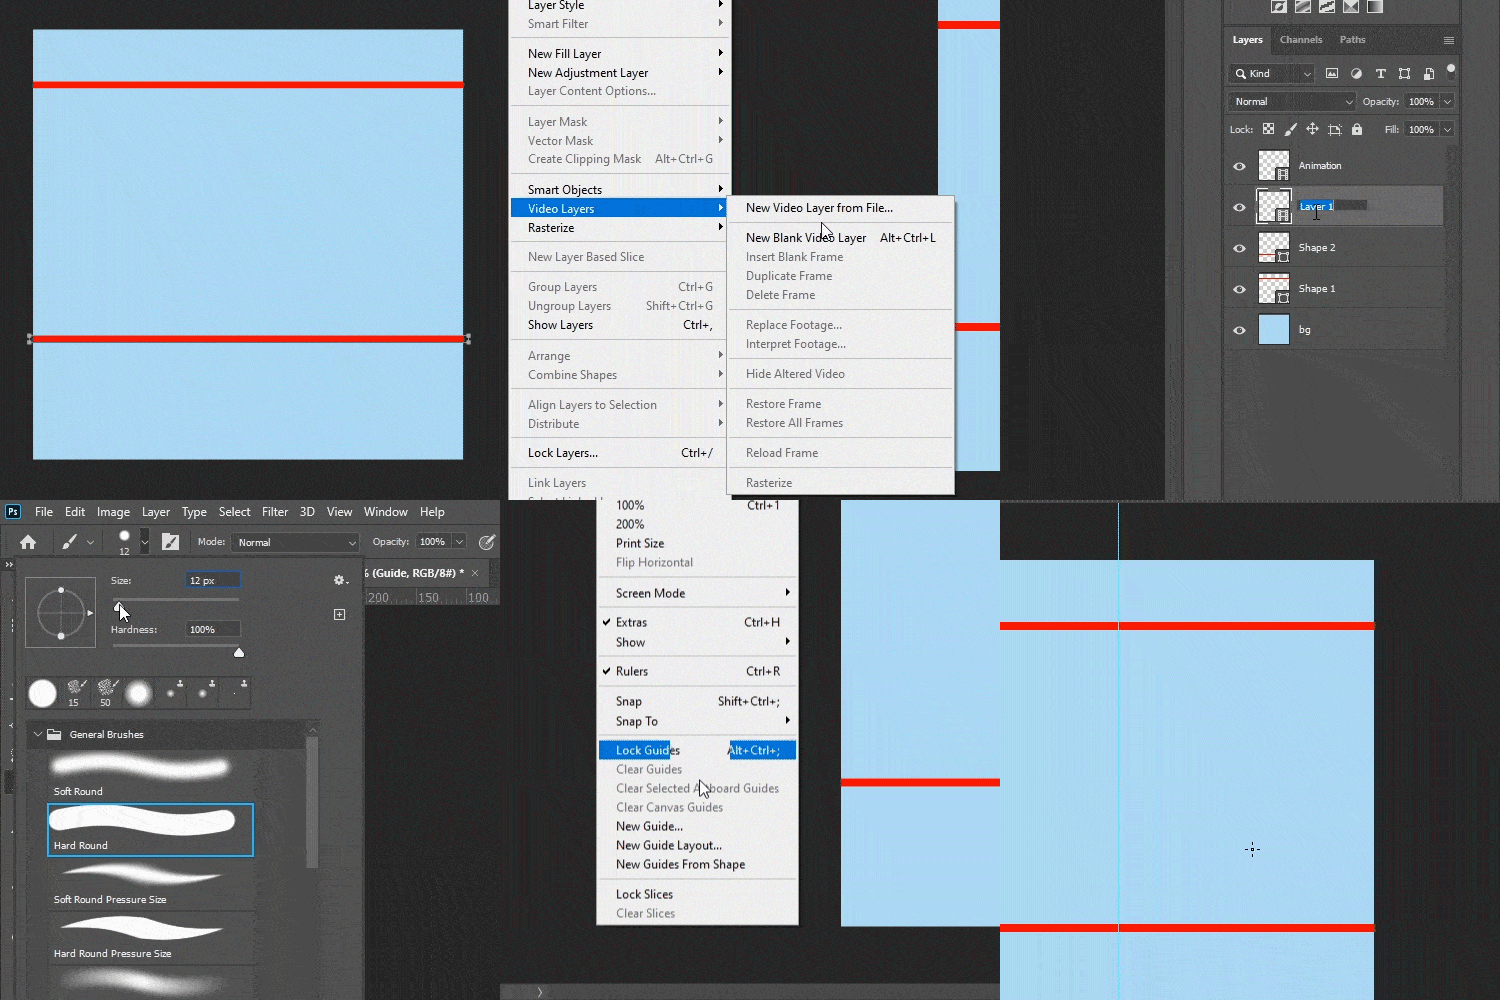
We can set this up by going to Layer, Video Layers, New Blank Video Layer. Let’s call this layer Guide.
Hot tip when working with video layers: Always ensure your layers start at the very start of the timeline when you create them.
Whilst we’re here, we can set up a brush that we will use for the guides.
Head over to the left menu and click the Brush icon (Shortcut: B).
Move on up (sing it) to the top menu and change the type and size of the brush to hard round and about 4 px respectively.
And one more thing in this step, let’s make a guide right in the centre of our canvas so we can keep track of the centre line.
Go to View, New Guide…, select the Vertical orientation option and type 50% into the box.
Let’s Actually Start Doing Some Hand Drawn Animation in Photoshop
… Right after we’ve turned snap off – we don’t want our cursor to be constantly snapping to that centre line we placed on the canvas.
You can turn it off by going to View and de-checking the Snap option (Shortcut: Shift + Ctrl + ;).
Now we can actually start doing what you came here for.
There are two ways we like to create animated guides.
The first is the most guide-like a guide can get i.e. it’s very basic.
You create some lines on each frame at the points in which the object(s) will be positioned.
Let me show you what I mean.
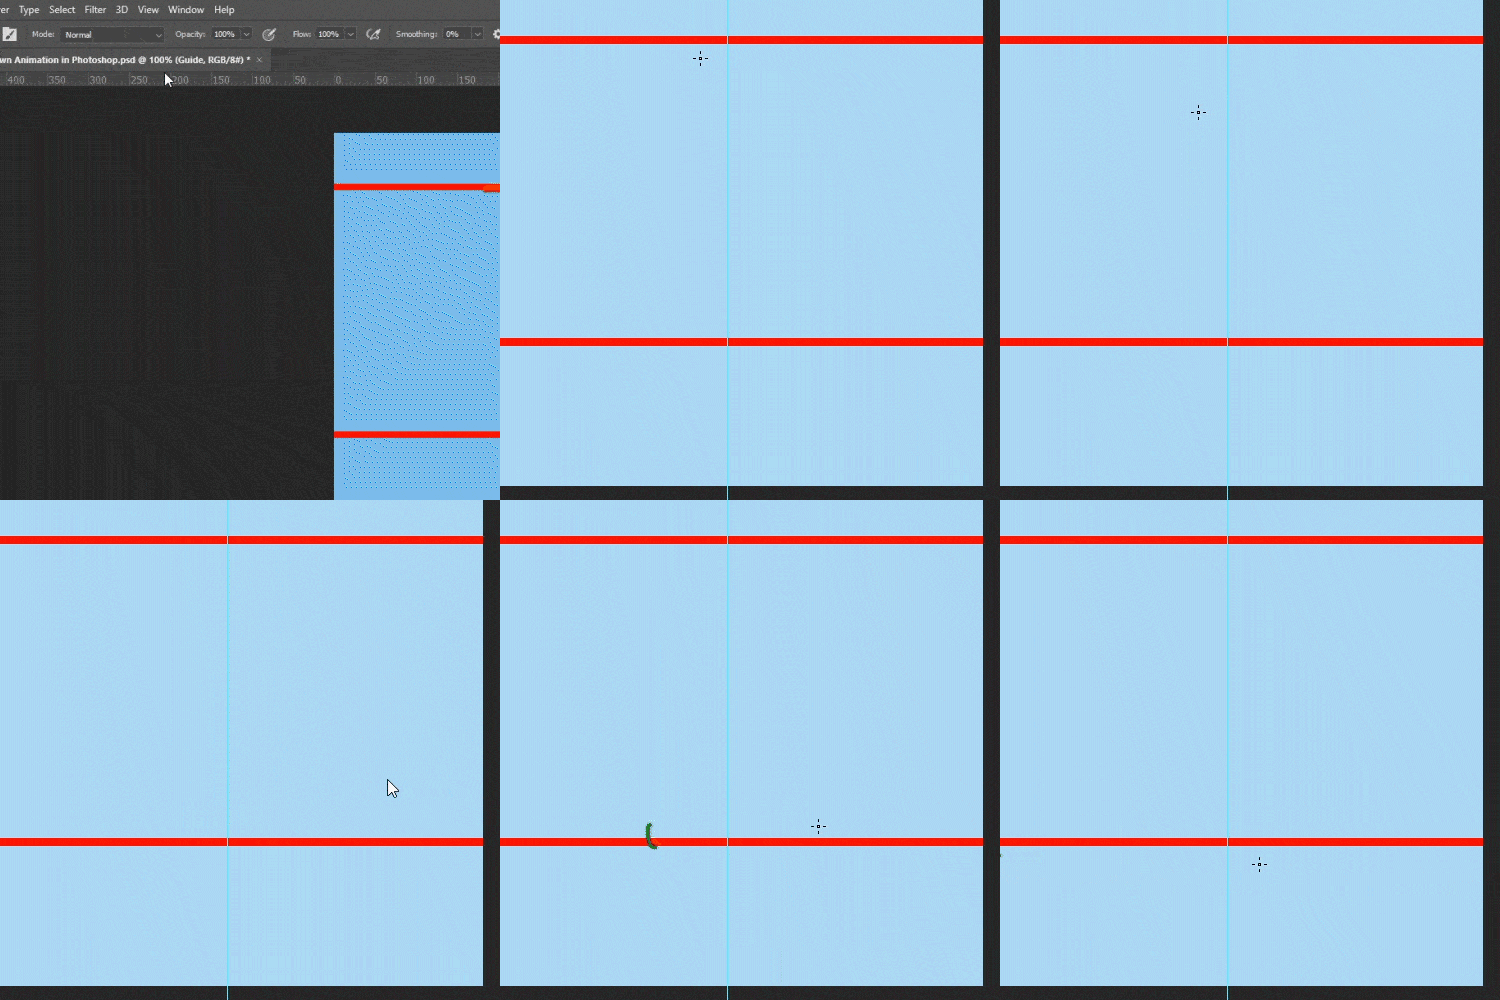
For this guide, we used a dark green hard round 4 px brush.
Starting on the first frame in the Timeline, draw a line to represent the area in which the object will cover in the first frame.
Have a look above for ideas.
Continue doing this frame by frame, adjusting the distance between each guide line.
To move along one frame, use the Page Down key, and if you need to move back a frame, use the Page Up key.
What are Onion Skins?
A helpful tool for the next step and beyond is the Onion Skin tool.
It can be turned on from the Timeline menu – just go to the Timeline menu and select Enable Onion Skins.
This tool is great; it takes the frame before and after the current frame and provides you with a composited image of the two, allowing you to see where you need to draw on the current frame.
This makes it a lot easier to see what you’re doing and provides you with the most accurate point of reference you can get.
There’s a GIF in the next step showing how helpful this tool is, and how it can be applied to your own animation.
A More Detailed Guide Layer
Before adding detail to your animation, it’s a good idea to create a detailed guide layer.
This will help you to work out exactly where you need to draw when it comes to producing the final look.
From here, we can start producing an animation close to that of our completed piece.
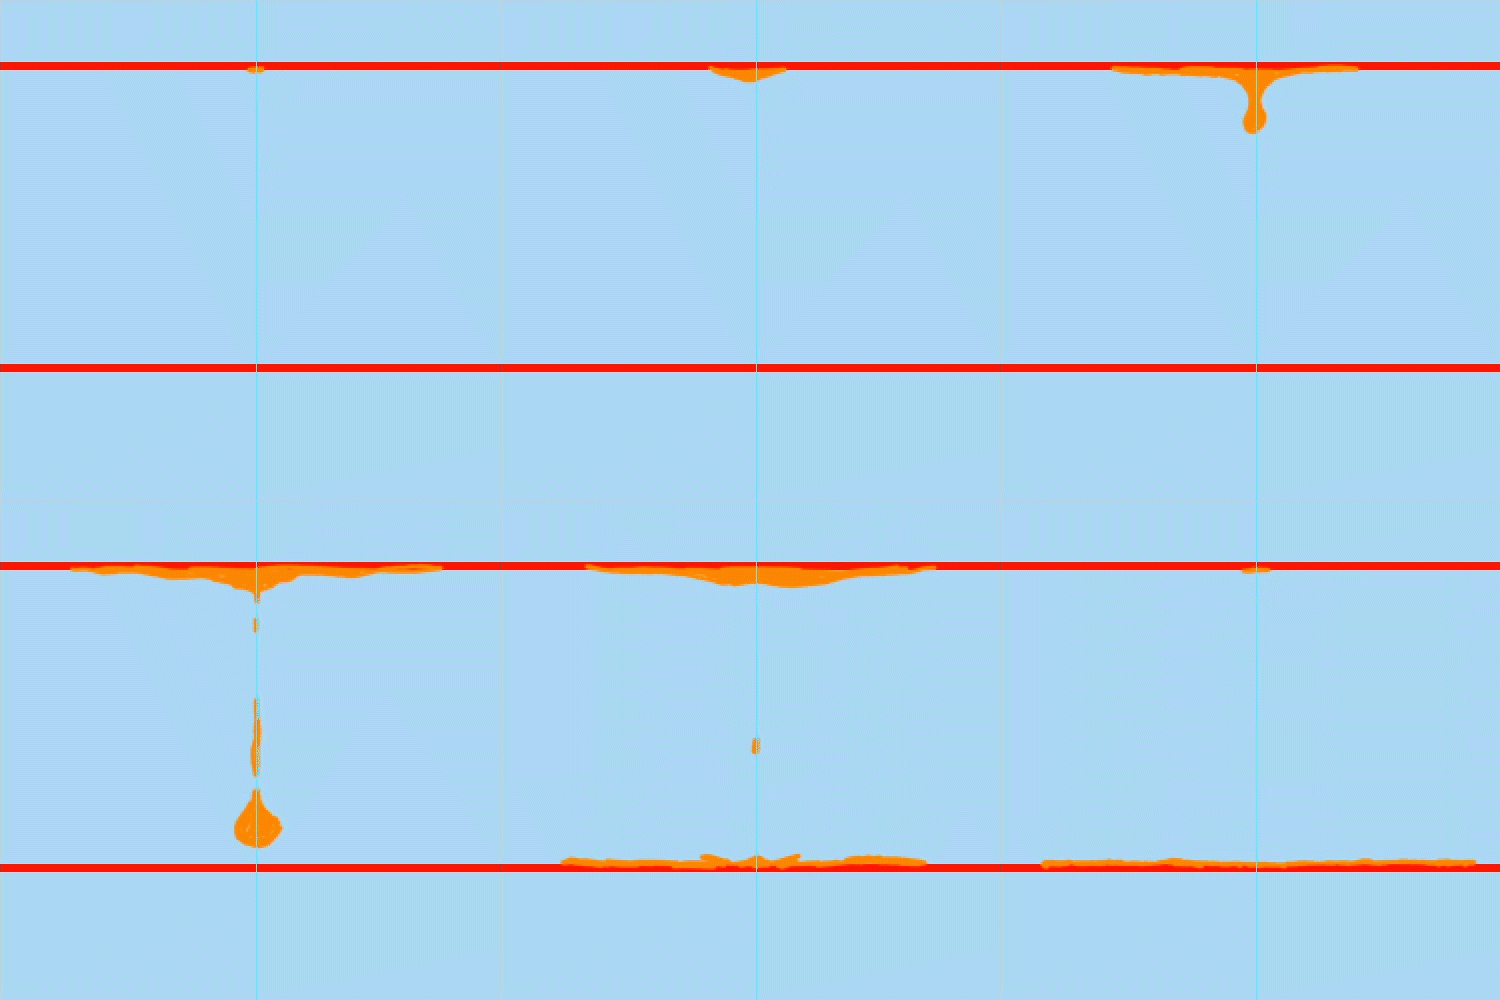
Take a look at the GIF below to see the animation style and speed that we used for our water droplet animation.
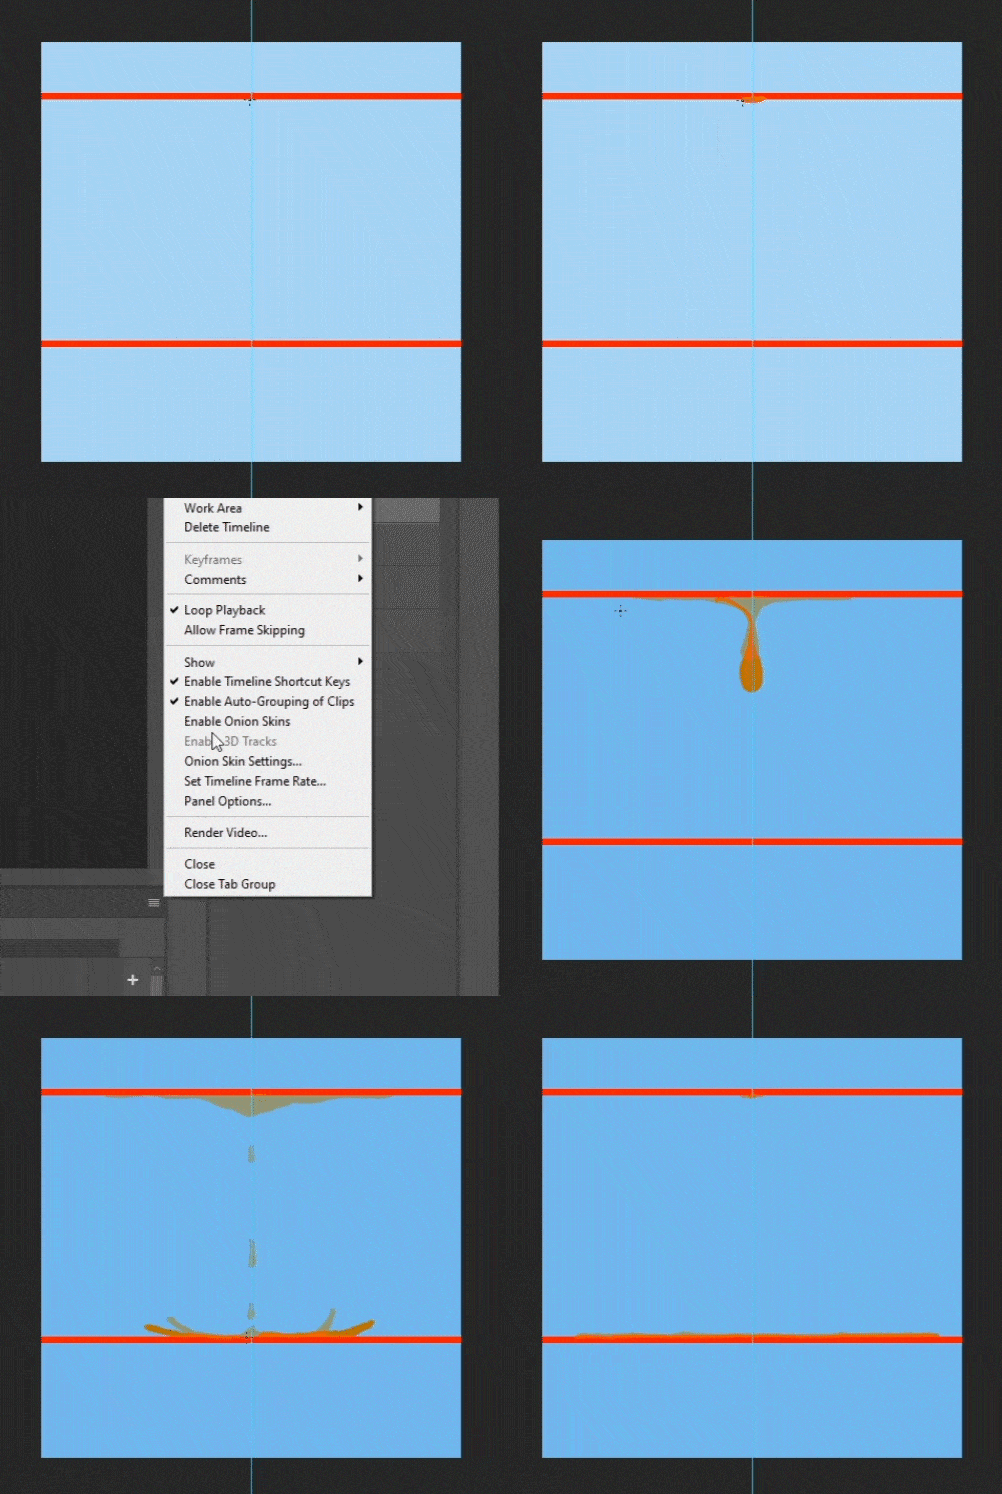
Using this guideline will help us determine the overall look for our animation.
We can now refine it and adjust the speed and motion of the object(s) in the scene.
We’re happy with how ours turned out, so we’re going to stick with in for the final few steps.
Here’s our animated water droplet so far:
Using the Guides to Add Detail to the Animation
We’ve done the majority of the hard word at this point, you’ll be glad to know.
All we really need to do now is stylise our animation to suit our design specification.
In our water droplet animation, we’re going to use a brush from Kyle’s Brush Pack – it’s full of great brushes that would suit any project.
The brush we’ve picked is called KYLE Bonus Chunky Charcoal.
For this step, we went over our detailed guide with the aforementioned brush making sure we added some more definition to the shape of the water.
Adding pointed elements and small splash detail here and there sells the effect.
Here’s a timelapse of this process:
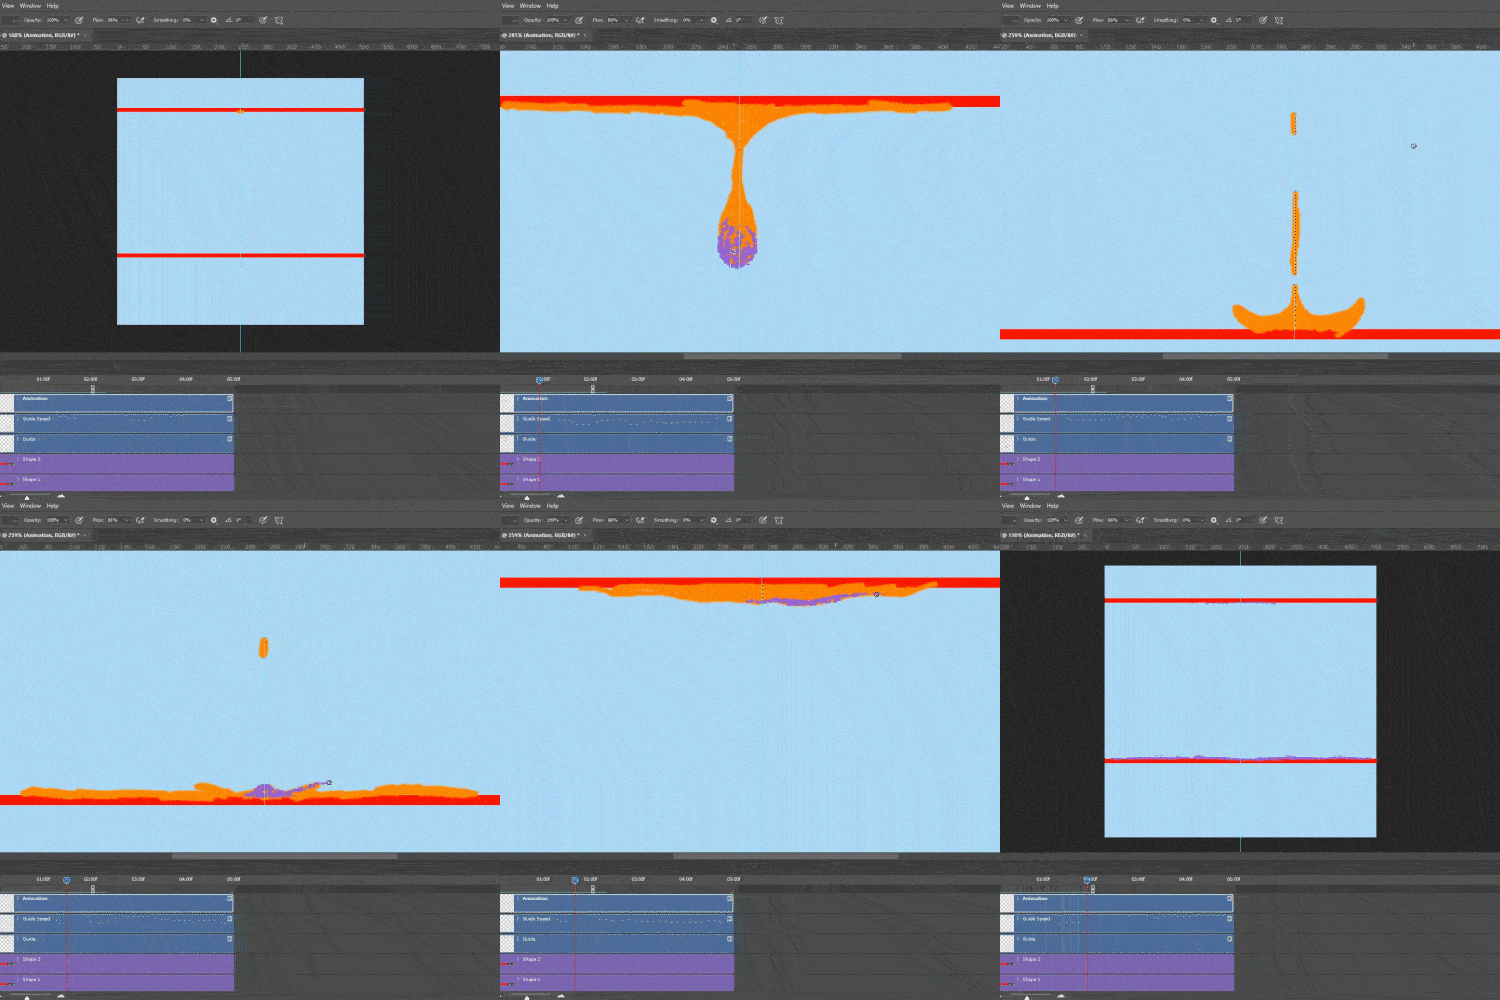
One thing that helped us with this process was switching between using the Onion Skin mode and not using it, as you can see in the GIF above.
This allowed us to keep track of the little bits of detail that we added which weren’t in the detailed guide.
After creating the base animation, we set about adding some detail.
Adding Futher Details to Your Animation
To really sell this effect and make it pop, you want to try and add some shading and highlights.
If you’re going for a minimal flat look, you can skip this step and sit back and watch your animation on repeat.
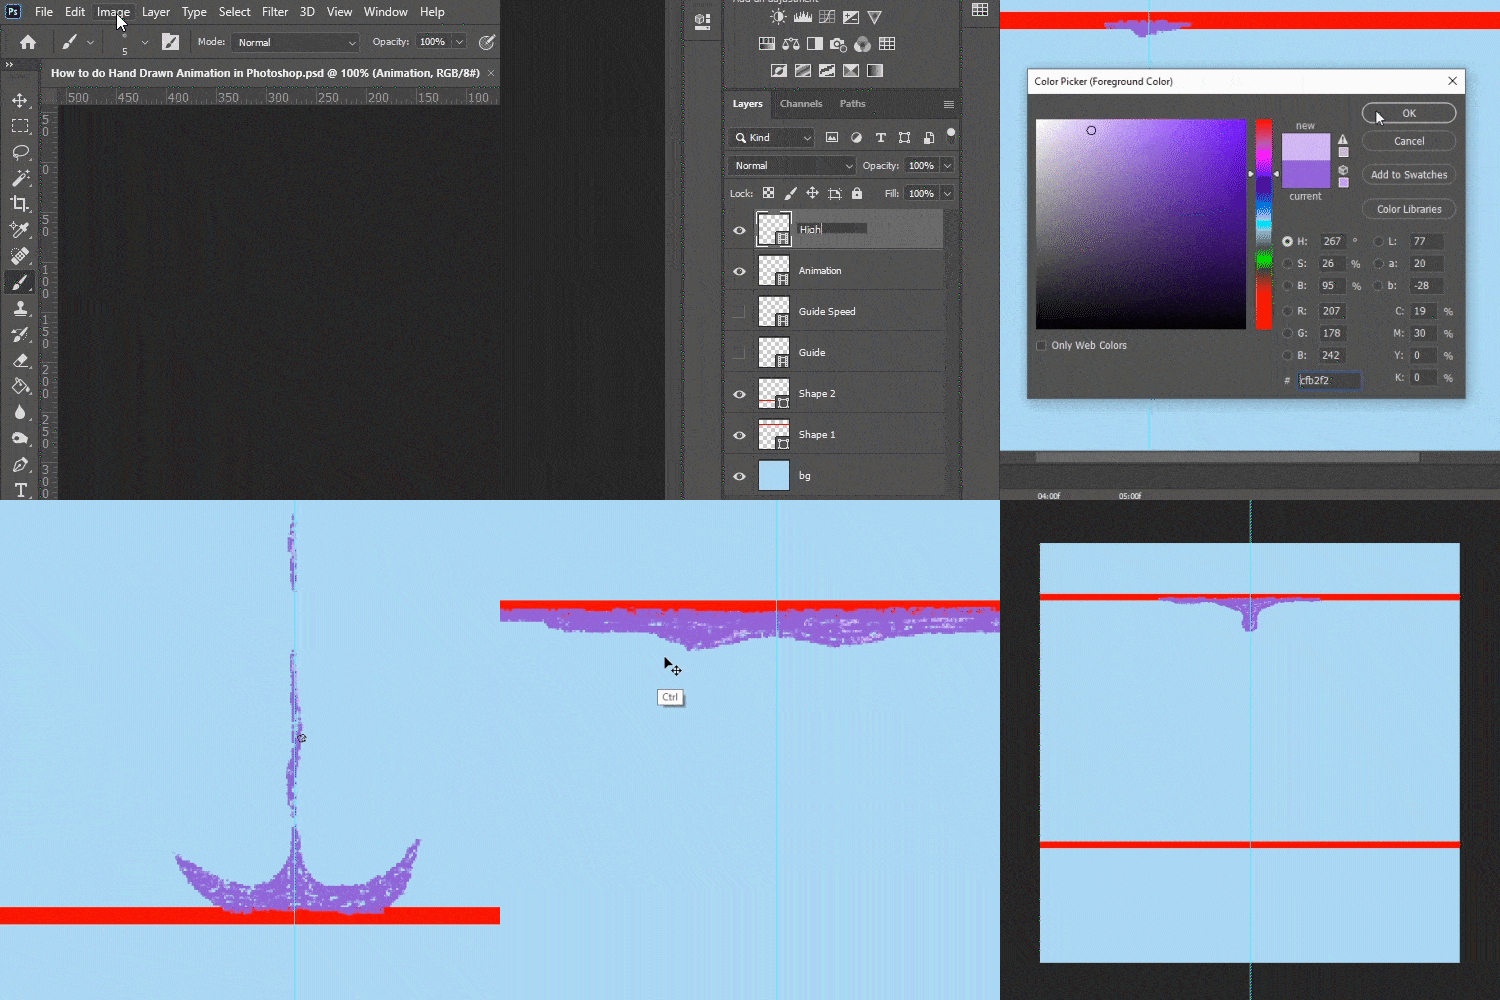
The first thing we did was add a New Blank Video Layer, in the same way as before.
Pick a direction you want the light to be coming from; we chose the right of the canvas for our animation.
Colour-pick your original animation colour and make your foreground colour slightly lighter.
Then add some highlights where you think they should go based on your light location.
Here’s how we did ours:
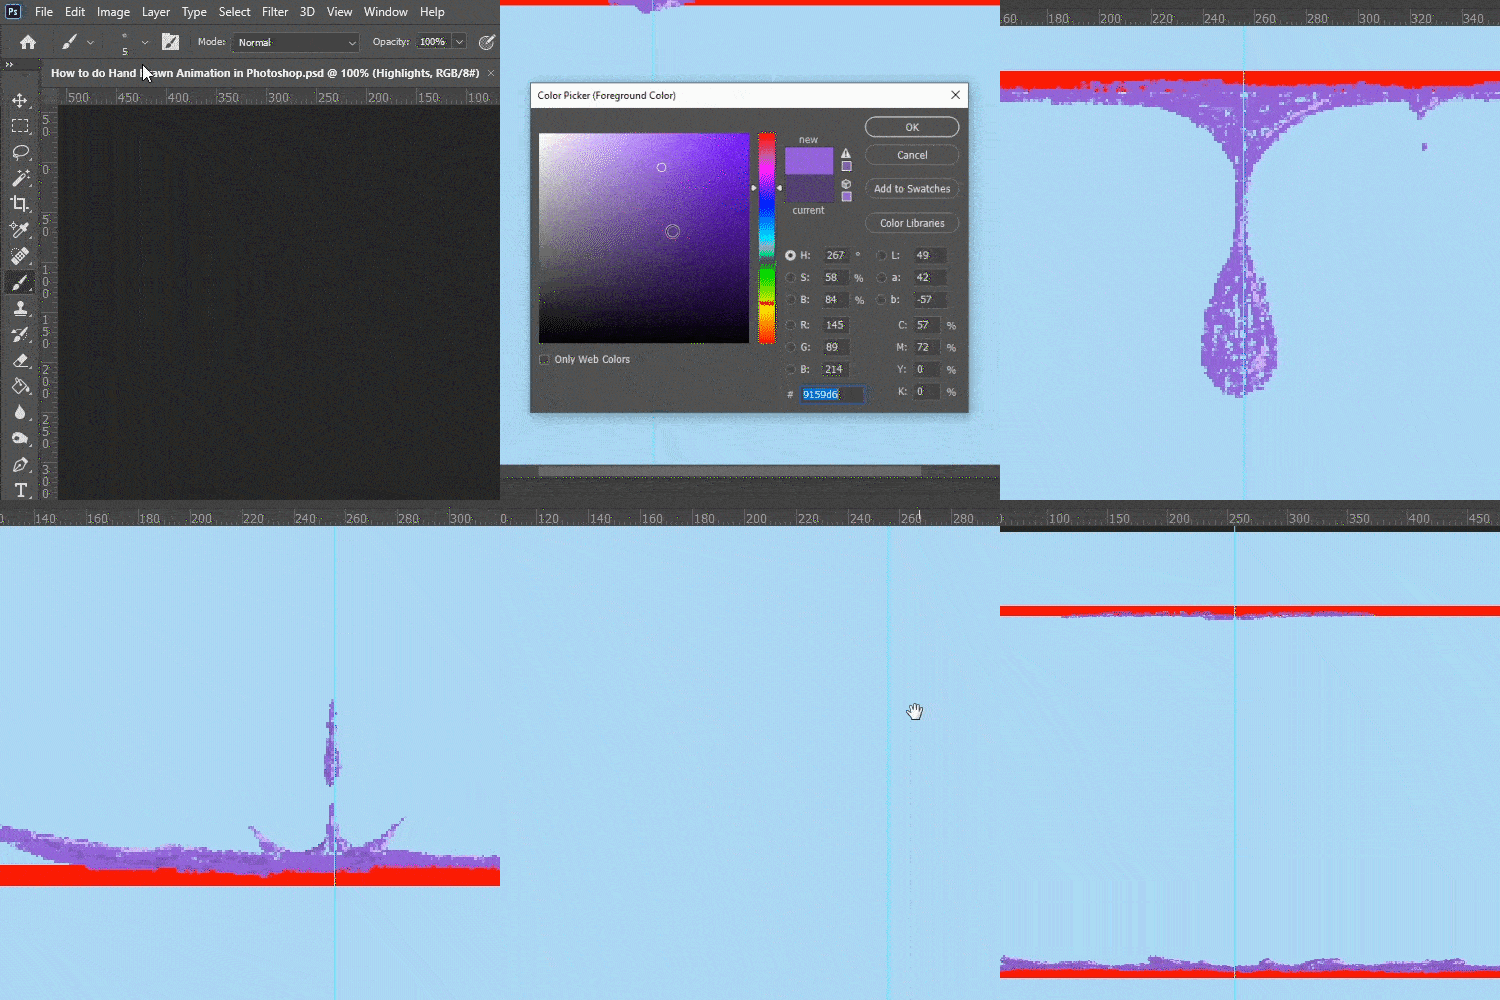
After doing the highlights, we went back through the same process, but this time we added shadows.
This gave our animation some depth and helped it flow that little bit more.
So again, we added a New Blank Video Layer, called it Shadows, then colour-picked our original purple colour and chose a slightly darker one for our foreground colour.
Here’s how that turned out:
Wrapping it up…
So that’s a quick insight into how we do hand drawn animation in Photoshop here @ Grizzle. Check out the final version of the GIF below (we’ve added a ceiling and floor to the scene). Hopefully, this has given you some good info to get started with this technique in Photoshop.

Drop us a line or give us a call if you’re looking for more info or if you need some mega animation services or a motion graphics studio to take your project to the next level.
Cheers for now.

